DIY Maxi Skirt
- 10 hours ago
- 5 min read
Perfect for Beginners

Shout out to my beautiful sewing students.
I'm very lucky to be able to teach sewing, I work for Lucy who runs Sonny and Scout. Located in Newcastle Australia I teach people the very basics of sewing, and while I have no formal sewing or teaching qualifications, I love sewing and I love teaching beginner sewing.
A student reached out and asked about how to make a maxi skirt, and I thought what a great opportunity to practice writing, so here it is, a DIY maxi skirt how to.
You will need:
measuring tape
sewing machine
thread
fabric - lighter weight swooshy fabric works best... but you do you.
scissors
iron

To start with your going to take your waist measurement.
For a simple gathered skirt, times this measurement by 1.5, for a voluminous skirt times it by 2.5 - 3.
My waist is 89cm, and I times this by 3, for max swish factor.
this gives me my skirt circumference = 267cm.
You are then going to decide how long your skirt will be. You measure from your waist to your ankle; this measurement will be including the hem allowance.
I basically want to end up with a tube, depending on my fabric I will either need one big rectangle, or two smaller rectangles.
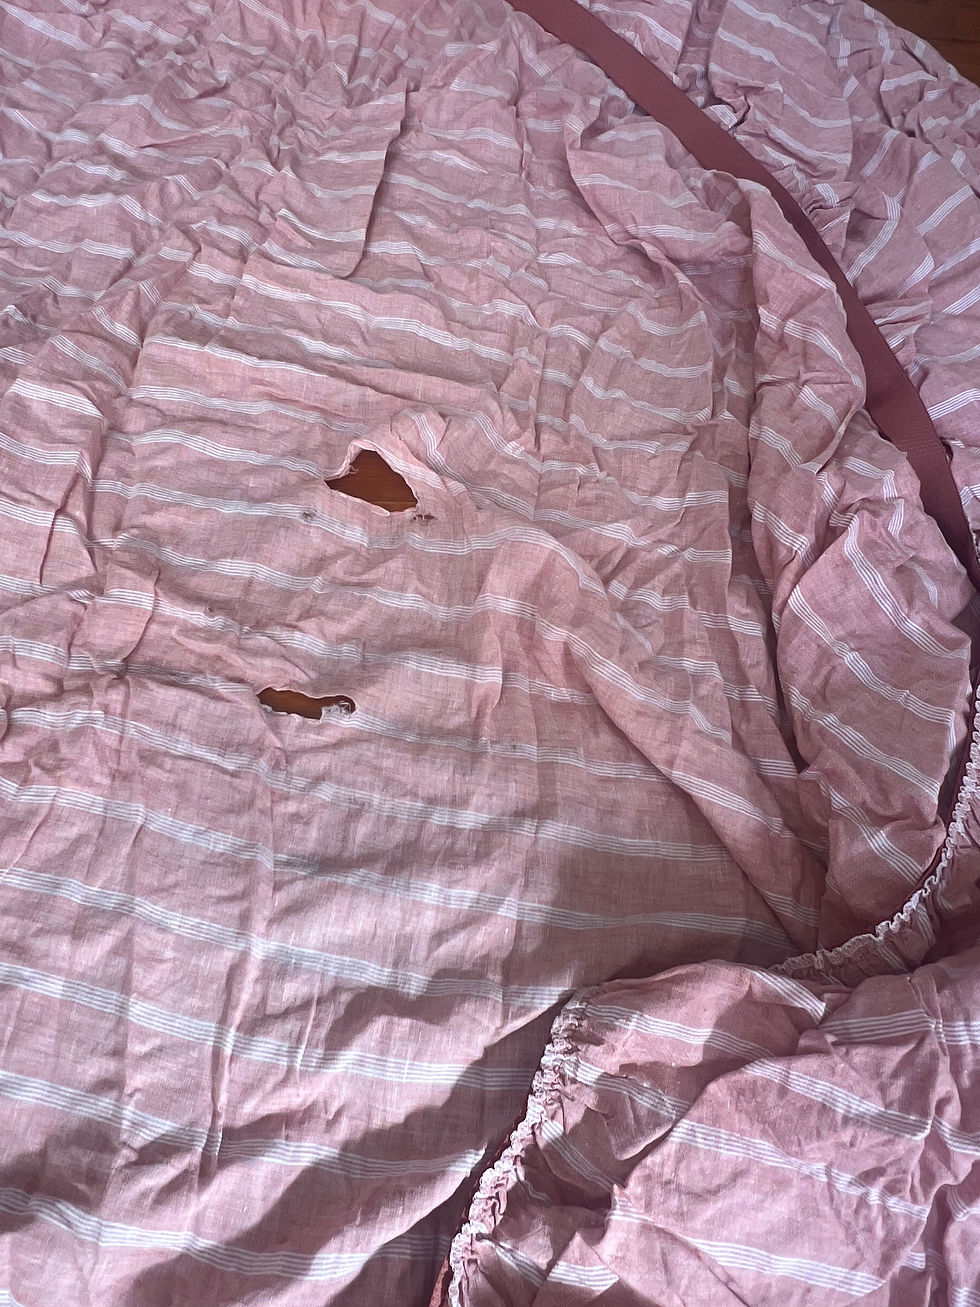
This will depend on your fabric choice. I'm using a damaged linen sheet that a school mum gave me for projects. The joy of talking about sewing, is that people generally give you stuff. I used one big rectangle to make this skirt
Choose your elastic. My sheet came with elastic, so I wrapped a section of the sheets elastic around my waist and cut the length that was a good fit.
This skirt has a lot of volume, and I still want an elastic waist, but I don't want all that volume around my waist, so I'm going to make a separate waistband. This is a separate smaller rectangle that will encase the elastic. Measure your hips (or the widest part of body) add approx. 7cm, this will be the length of your waist band.
The width of your waist band will depend on your elastic.
measure the width of your elastic, double that measurement and add 3cm.
My elastic is 3cm wide. The width of my waist band is 9cm (3cm x2 +3)

By now you should have
1 length of elastic
1 rectangle for the waistband
Either one big or two smaller rectangles for the skirt
Remember, your rectangle may be more like a square, depending on your height and your fabric.
Let's sew!! (Stitch length is between 2.2-2.6)
BUT how about we do a french seam for something a little more elevated
(You can totally do a regular seam, just put right sides of the fabric together and sew 1cm from the raw edge)
We're sewing the side seam/s of the skirt.
Place the side seams of the skirt wrong sides together.
Sew 1 cm from the raw edge, remembering to go back and forth at the very beginning and the very end.

Trim this seam, close to the stitch line, but being careful not to snip the stitches.
using your iron, give this seam a press flat.

Turn the skirt inside out and press seam closed.
Sew a straight line down the side seam 0.5cm -1cm from the edge.

I sew this seam using the edge of presser foot for guidance, so my seam allowance is generally 0.8cm.
Press the seam to one side

Yay, you should now have the beginnings of a skirt! You should be looking a tube shape that when you step into it, falls close to the floor.
Gathering stitch. 'Do not back stitch for this section'
Change your stitch length to the longest it can go. On my machine that is a 5, but on others it may be a 4. This is a very loose stitch.
Sew a line of stitching around the top circumference of your skirt, approx. 1.5-2cm from the top raw edge.

You can sew a second line of stitching, approx. 1-2cm below that first line of stitching, in fact it is recommended, I haven't, and sometimes my gathers can get stuck under. But Free will and all that.
Gently pull the thread, moving the gathered fabric around so that its evenly distributed.

Now the waist band. 'Don't forget to change your stitch length back to 2.2- 2.6
Align the short ends of the rectangle right sides together, sew a straight line 1cm from the raw edge. Press the seam open.

There are a couple of different ways to approach the next step. One of my favorites is to sew around the circumference of the waistband 1cm from the raw edge. This provides a guide for folding the fabric to attach to the skirt.
Another way is using your iron to press up a 1cm seam to the wrong side of the fabric. Both of these options can be done prior to joining the short ends together
Now to attach the waist band.
Using pins or clips to attach, align the right side of the non-pressed/stitched edge to the wrong side of the skirts gathered top edge.
redistribute the gathers so that the skirt fits to the waistband.

Sew a straight stitch seam along this edge, using a 1cm seam allowance, ensuring that the gathers are all included. (don't forget to backstitch at the beginning and end to secure the seam)
Press the seam towards the waistband

Sewing the waistband down; a longer stitch length here can look nice; I used a 2.8 stitch length.

Fold the waistband over, and pin so the fabric is covering the stitch line. Sew close to the folded edge, leaving an approx. 5cm gap to thread your elastic through.

Thread your elastic through. I have an elastic bodkin, but a safety pin also works.

Try your skirt on!! adjust the elastic, overlap the elastic and pin together. Take the skirt of and sew the elastic together using a zig zag stitch. Don't forget to back stitch at the beginning and end, you want that elastic to be secure.
Change back to straight stitch and sew the waistband shut.
Your so close to being finished. Just the hem to go
Try your skirt on!
For my hem, I folded up approx. 1cm, pressed with the iron, then folded up

You could also fold up 1cm, then fold up another 1cm
I used the stripe of my skirts fabric to guide me.
If your skirt is too long, you can make a deeper hem or trim some off.

Voila! you have a skirt!
Congratulations!
Give the skirt a good iron, and she's ready to wow.


Comments