DIY Floor Cushion
- May 22
- 6 min read

Trials and tribulations of creating the perfect floor cushion
Aka fabric scrap storage
Disclaimer: you can choose to make this any size, with whatever fabric you choose. This is how I make mine, feel free to do you
So you want to make a foot pouf. A fabric storage foot stool for your fabric scraps. Or maybe you have some old clothes/socks/undies/ gym clothes and fabric recycling is just not in the wheel house.
Lets divert some textile waste from landfill.

What you’ll need
Scissors
Thread
Sewing machine
Medium- heavy weight fabrics
25cm zipper (or what you have on hand, I’ve used smaller but it makes it harder to stuff)

Dimensions
2 x squares of fabric 44cm x 44cm. Remember you can join many smaller pieces together to get to this size. This is the top and bottom of the floor cushion
2 rectangles 26cm x 10cm. This is for either side of the zip
1 rectangle 24cm x 13cm. This is the handle, you can make it a different size if you want
1 rectangle approx. 127cm x 16cm. This is the side of the floor cushion
1 zip- I used a thrifted zip approx. 25cm, but use what’s on hand and adjust the zip/side rectangles accordingly

To make your own
1. Select your fabric. You’ll want to choose a medium to heavy weight fabric/s. Trust me on this. Many trial and error have come to this point in my floor cushion making journey. You can re-in force the fabric by quilting, layering or adding interfacing, if you have your heart set on using a piece of fabric that is light weight
You don’t have to patchwork, but I am, so you do you boo.

2. Join your scrap pieces together using a 1cm seam allowance (S/A), remember it doesn’t have to be perfect, just functional, if those seams are a little crooked, don’t stress it too much. I sew the seams with a 2.2 stitch length
Your aiming for a square approx. 17inch x 17 inch or roughly 44cm x 44cm- this is including the seam allowance.
To finish the seams (using your method of choice- I use my overlocker, but zig zag totally works) you need to sew the seam closed. Both raw edges get joined together.


3. For added strength top stitch the seam down. Either side works. To do this, you can press the seam to one side then using a longer stitch length sew the seam to the main fabric. I do this from the right side of the fabric using a stitch length of 3.0, using the edge of my presser foot as a guide.

Press seam to one side

Top stitch, I use my presser foot as a guide

Top Stitching
Highly recommend finishing the seams and top stitching, it reinforces- adding strength to the seams that will be under a bit of pressure.
4. Make a second square. One will be for the top and one for the base, the base can be plain, or patchworked.

The Top and bottom squares

Top stitched
5. Place the squares right sides together- they may not be exactly the same size- that’s ok, they’ll get trimmed into a circle shortly.

6. Trim the corners to make a rough circle shape. You can use a piece of string with a pen attached to the end to get a circle shape if you want. I don’t. It’s a floor cushion, close enough is good enough.

Trim

Its ok.. it'scircle esque

I keep mine lined up, its not excatly a perfect circle
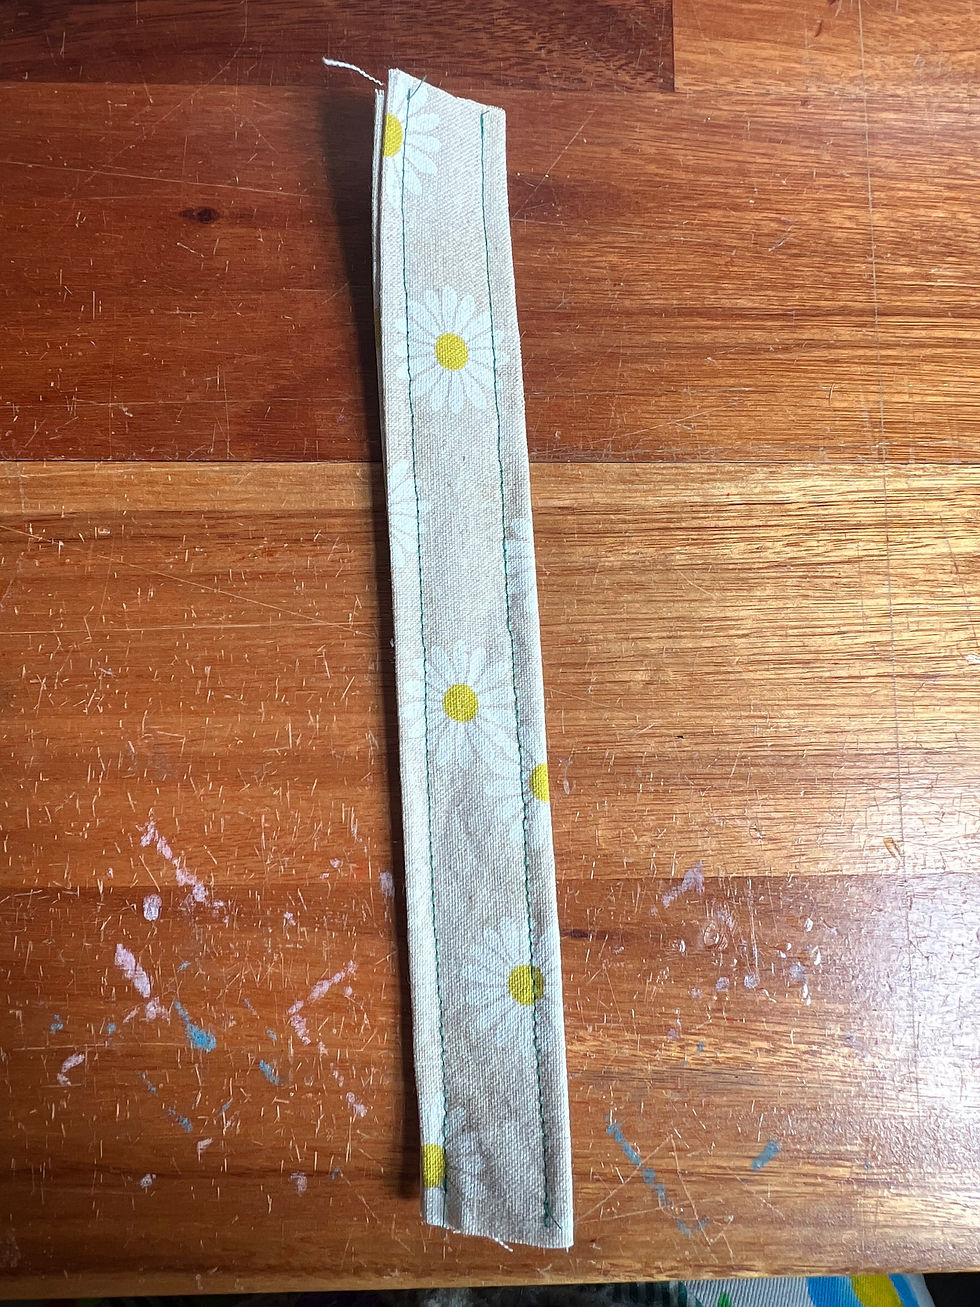
7. Make one or two handles. I’m making one for this project.
Fold both the long raw edges into the middle, then fold in half. Sew down either long edge, I use straight stitch with a 3.0 stitch length, but you could zig zag or decorative stitch. This makes a sturdy handle to pick your floor cushion up with.
Once the handle is finished clip it too the circles. Choose a non-seamed section, and clip to the top and bottom circle.

Wrong side up

Fold outside edges in

Fold again and sew closed
Once the handle is finished clip it too the circles. Choose a non-seamed section, and clip to the top and bottom circle.
Sew down both side

Attach with pin/clip so its even, top to bottom
8. It’s zip time. Take the two smaller fabric rectangles that you’ve selected to go on either side of your zip. Finish the raw edge of one long side of each rectangle.

Lay out your pieces

Finish the seam- the long edge of one side of the rectangle
Take one of the rectangles, place the zip facedown along the seam finished edge, using a zipper foot, sew a straight stitch along this edge, as close to the teeth of the zip as you can.

Zip is face down along the seamed edge

Sew a straight stitch

I start at the metal tab stopper
You may find that you can’t sew past the zipper head. What this looks like will depend on if you are starting to sew the zip open or closed. To get around the zipper head, you can sew the edge zipper in two sections or you can put your needle in the down position, lift your presser foot up and move the zip head out of the way.
Ok, now to attach the other rectangle piece of fabric. Close the zip, lay the zipper tape edge that is not attached face down along the long seam finished edge of the other rectangle. Sew a straight seam along this edge. We can now change back to our regular foot. Now’s a good time to check that your zip opens and closes!

Last step of the zip is top stitching. Using a 3.0 stitch length, sew a line of straight stitch along the edge of the zip seam. I use the edge of my presser foot as a guide to keep my top stitch even.

The fabric rectangle may be longer than the zip, or uneven- totally ok, we just need to trim the edges down. Find where the metal ends of the zip are, add a 1cm seam, draw a straight line down and trim the excess.
· There are many ways to insert a zip, this is a very basic, kind of throw it in; if it works, it works’, way of doing it.
· It’s ok if it’s wonky
· If the zip works, then you’re good
9. We’re now working on the side piece of the floor cushion. Take the long rectangle piece, and lay it down right side up, take the zipper rectangle and lay the short end of the zipper rectangle along the short end of the long rectangle piece.
Join these two pieces together, with a straight stitch, finish the seam and press to the non-zip side. Top stitch the seam down.


The seam has been trimmed

sew the seam and finish the egde

Top stitch down
10. Now to attach the pieces together, if you think the long rectangle piece is the right length, join the short ends together
11. BUT: if you’re like me, and not quite exact…
12. Pin ( I use clips) the long rectangle to the circle shape. I pin both circles at the same time and work my way around till I get to the end, then I see how close I got, sometimes I am exact, sometimes I have too much, and other times... like with this project, I’m short by a little bit.

I start pinning both sides and work my way around

over lap the ends and sew shut

all clipped and zip is open
If you’re exact, sew those short ends shut. You don’t have to unpin the whole thing, just unpin enough so you’ve got room to work. Finish the seam and top stitch down.
If you have to much, just pinch out what you don’t need and sew the seam, the trim the excess, finish the seam and then top stitch.
If you’re like me, and don’t have enough, choose a piece from the scraps and add a little extra!! Then you can sew it shut, finish the seam and top stitch down.

This is not an exact pattern make. There is room for creative license!
13. You’re so close to finishing!
At this point you should have the side now looking like a joined circle, and the long edges of both sides pinned/ clipped to the circle top and bottom.

Make sure the zipper is open before you top/bottom to the side- you will turn the floor cushion the right way out through the open zip.

Sew a straight stitch (1cm S/A) around each of the pinned/clipped edges, top and bottom. When I reach where the handle is pinned/clipped, I go back and forward a few times to just reinforce this seam to prevent ripping, finish the raw edges of the seam and you now have a floor cushion.

The Inside

Tadah
14. Turn right way out and stuff!!
That is how I make a floor cushion. This is number 10 for me, and I’m now very happy with the size, but of course if you want bigger, smaller, taller, the same principle applies.
Congratulations.


Comments